The new Raspberry Pi 4 Model B can perform extremely well in an on-premise server cluster as a replacement for cloud services like AWS. The usual drawback is the lack of x86 support given the Linux ARM package ecosystem is still nascent. I’ve hacked in x86 capabilities resembling Apple’s Rosetta 2.
Specs

I’ve replaced using AWS for smaller projects and development using this 16 core, 20GB RAM, 512GB of storage cluster.
The setup of the instances in the cluster are:
- main: Raspberry Pi 4 - Quad Core - 8GB RAM, 256GB SD
- Kubernetes master
- Kubernetes node
- s3fs mount
- GitLab CI Runner
- Jump server for VPN and Traefik reverse proxy
- s1: Raspberry Pi 4 - Quad Core - 4GB RAM, 64GB SD
- Kubernetes node
- s3fs mount
- s2: Raspberry Pi 4 - Quad Core - 4GB RAM, 64GB SD
- Kubernetes node
- s3fs mount
- w1: Raspberry Pi 4 - Quad Core - 4GB RAM, 128GB SD
- Kubernetes node
- s3fs mount
The main instance serves as the jump server and is the only box exposed to the external internet. The rest proxy through main. It has the highest RAM and largest storage since it needs to run multiple GitLab CI build jobs, perform proxying to the other instances, and run a VPN so I can access the local network from anywhere. It also acts a Kubernetes node, but typically doesn’t host anything unless the others are full.
The s1 and s2 instances are meant for hosting applications via Kubernetes.
The w1 instance can be used for hosting applications via Kubernetes. But, it is more of a general purpose box to SSH into for ad-hoc Linux work, use as a remote Docker host, and run long-running jobs or fan-spinning jobs I don’t want to run on my MacBook Pro.
Hardware
Storage
For storage I am using SDXC flash memory cards instead of an external hard drive to keep it portable and fast. SDXC cards, however, can be prone to failure on heavy read/write workloads. I haven’t had too much of a problem with this though, using reputable cards from a manufacturer like SanDisk lowers the odds of a card failure. Any vital data is placed in or backed up to the s3fs mount regularly.
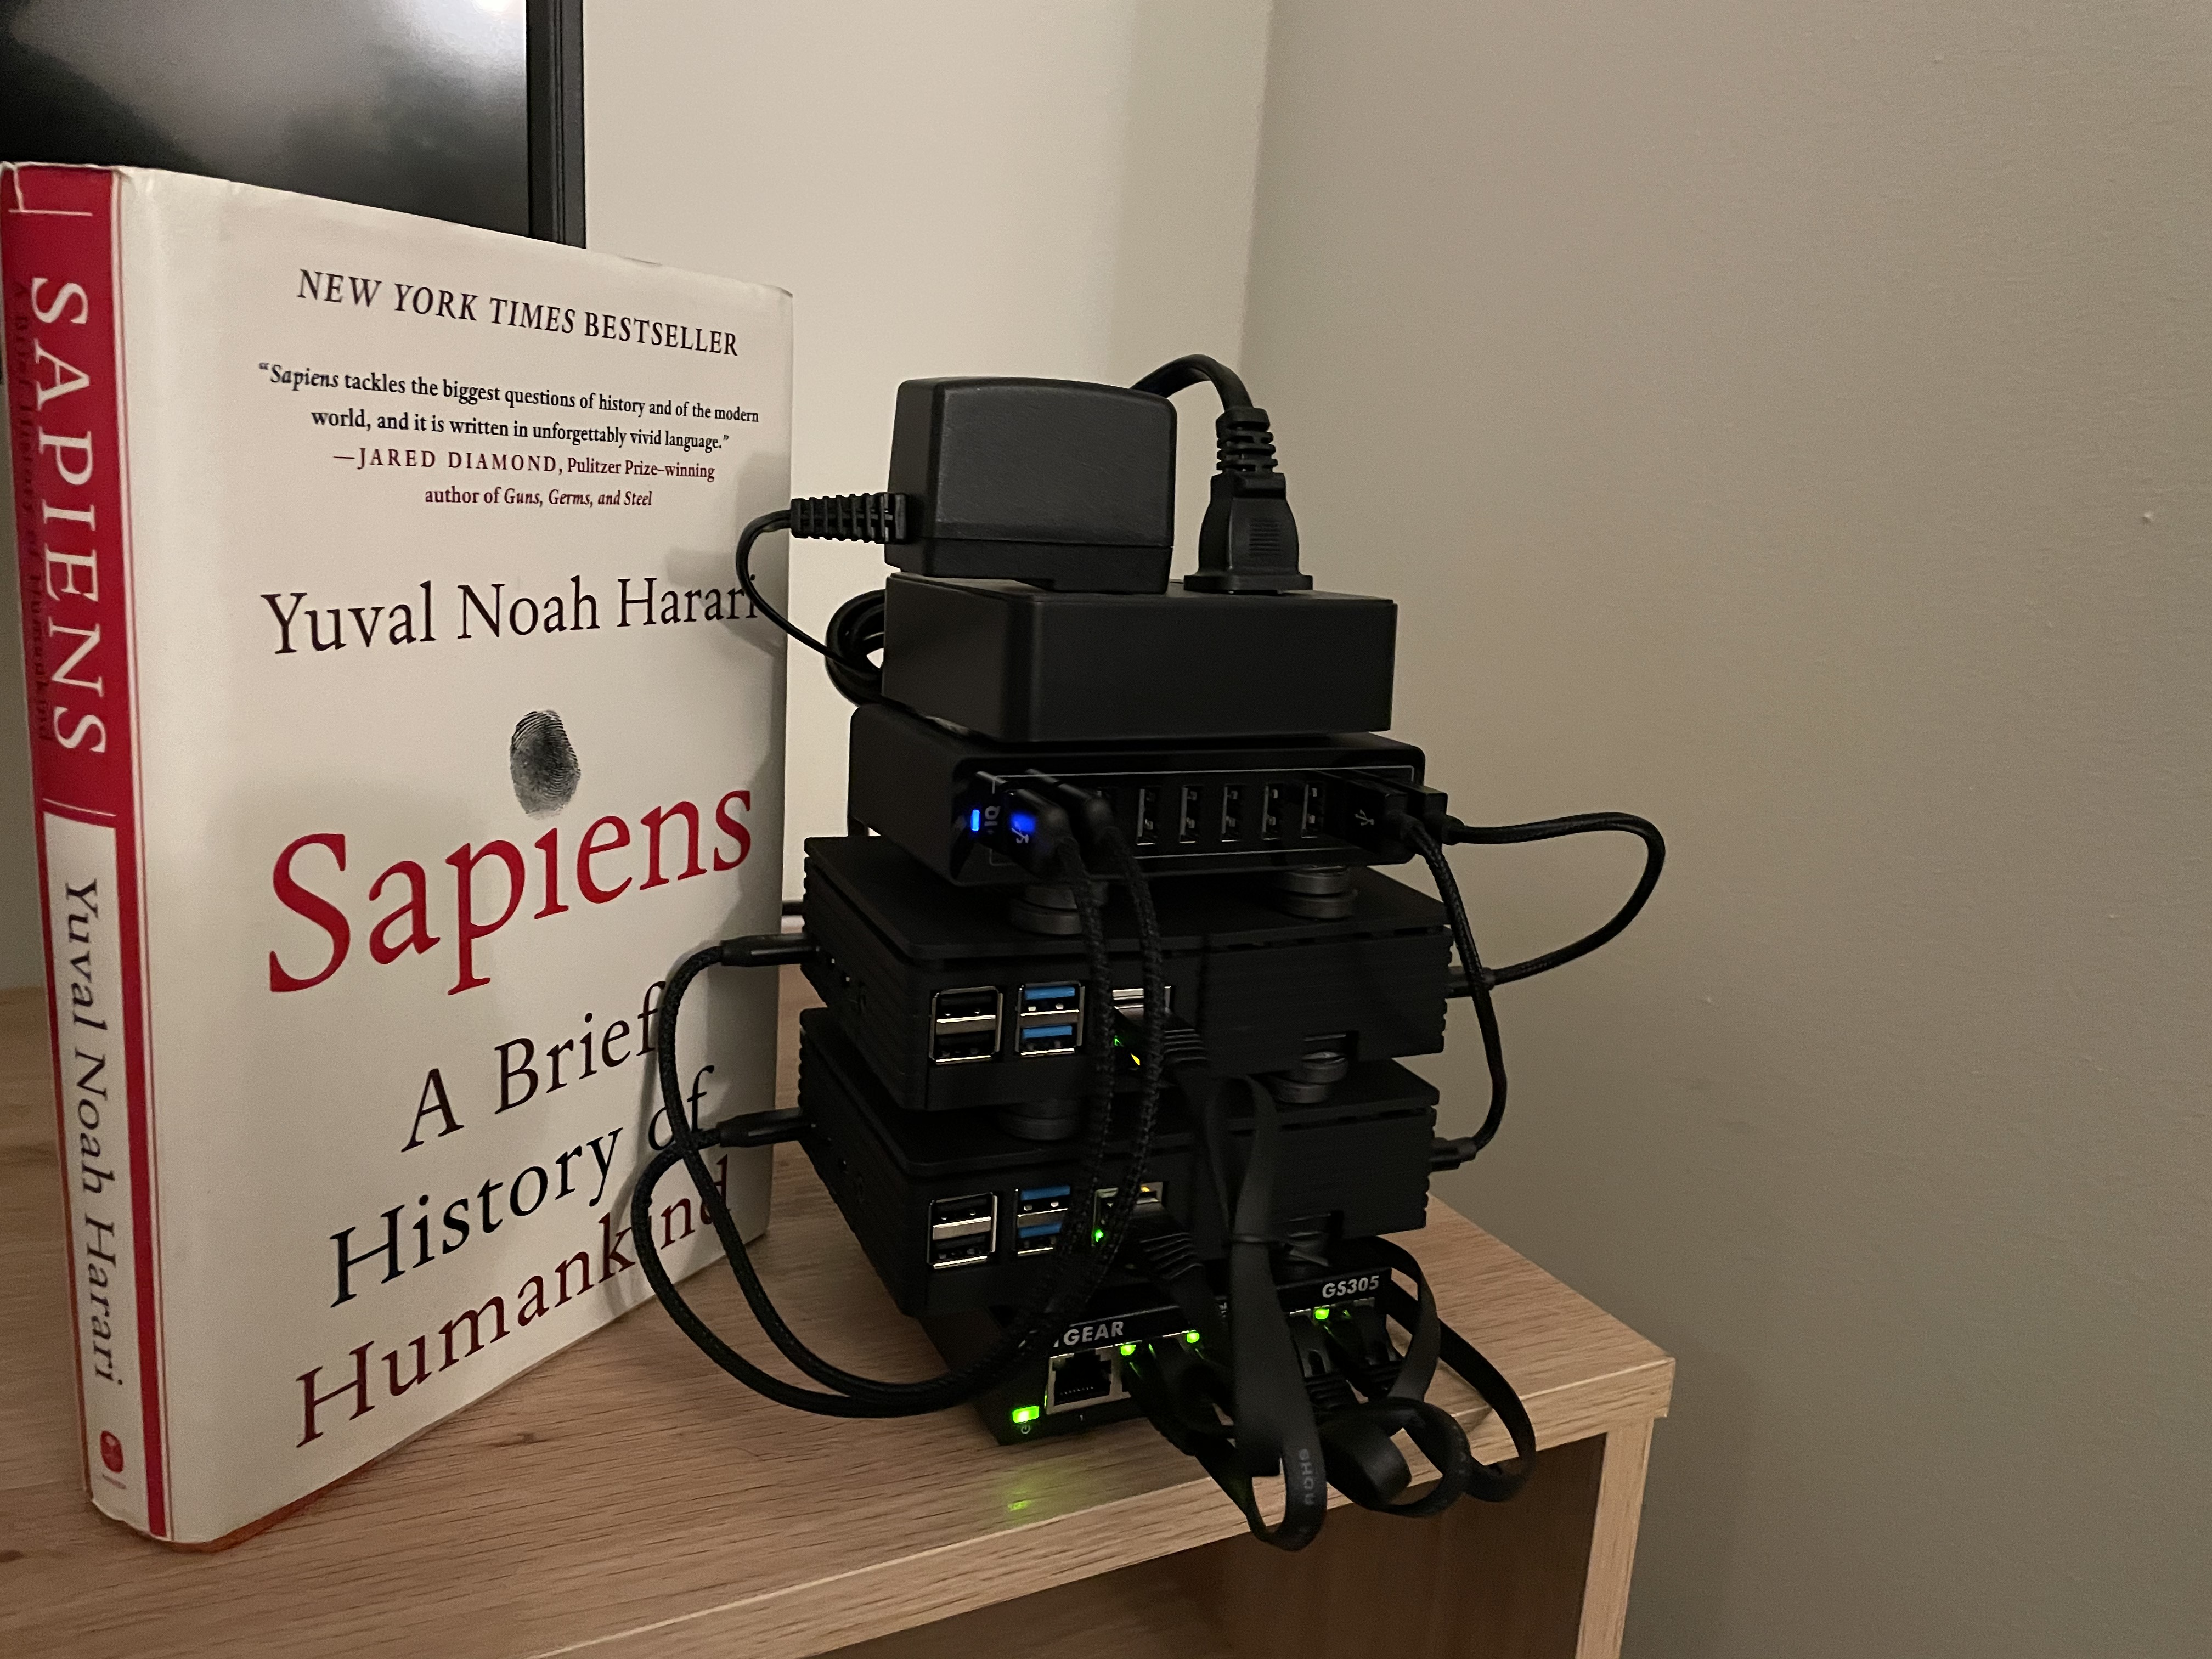
Network Switch
At the bottom, I am using a NETGEAR Ethernet network switch so I can plug in the cluster into a router using a single connection and that connection can be split 4 ways to each instance. While I always leave the instances plugged into the switch, I usually don’t connect the switch to a router as the instances can also connect over WiFi and those speeds are tolerable most of the time.
Cable Management and Power
In order to keep the build clean, short cables are used to connect the network cables to the network switch and the USB power cables to the reliable Anker USB power supply. Any longer cables are wound, zip-tied, and hidden in the back.
Since both the network switch and the USB power supply have an AC adapter, I attached a mini power strip at the top that they both plug into, so there is only one external power cable coming out of the otherwise self-contained cluster that needs to be plugged into the wall.
System & Storage
The system runs Ubuntu Server Edition for Raspberry Pi. I have flashing scripts that can flash SDXC cards with the operating system and custom initialization scripts for each instance. The initialization scripts handle numerous things including:
- Installing and running instance specific applications (Kubernetes via microk8s, GitLab CI Runner, Traefik, VPN server, etc.) and polls for updates to the initialization scripts using a cron so I can modify the software stack without re-flashing.
- Mounting an S3 bucket via s3fs for remote storage and shared storage between the cluster instances.
- The entire operating system is commited to a Git repository at the root
/. This saves a checkpoint of the server’s file system before anything else is installed. Then, with a script containing some simplegitcommands I can blow everything away if I need to restore and start an instance over from scratch without having to pop out the SDXC card and re-flash. This can be tricky sincegitisn’t made for volatile use cases like this, but it has worked suprisingly well with a proper.gitignorefile.
Networking
The initialization scripts automatically connect to WiFi so an Ethernet connection is not required, but can be used.
The main instance is exposed to the external network. The router port forwards specific ports to the main instance and other instances are proxied to main via Kubernetes and then Traefik exposes Kubernetes services and the VPN server to the external internet on main. The main instance updates a Route53 DNS record with its public IP address every few minutes as a method of dynamic DNS.
Traefik and/or Kubernetes with cert-manager automatically issues TLS certificates for applications using Let’s Encrypt.
Finally, instances can be accessed at hostnames like main.local or s1.local on the local network for SSH access automatically because the instances will publish themselves via the Avahi daemon using the Bonjour/Zeroconf protocol.
Running x86 on Raspberry Pi
The biggest downside to running on Raspberry Pi right now is the fact that it runs on ARM. That means many GitLab CI builds will fail since the Docker images might only be available for x86. There’s reason to believe this might change since Apple’s new chips are ARM-based and that will surely push adoption forward.
For now, however, I implemented a solution similar to Apple’s Rosetta 2 for running x86 applications on ARM. I use QEMU’s user emulation along with the binfmt_misc capability of the Linux kernel to transparently run x86 executables on the instances. This can also be done to enable running and building x86 Docker images.
However, just doing this, doesn’t seamlessly work as dynamically linked binaries need to be able to access x86 shared libraries not ARM ones. In order to solve this, I download a x86 version of the same Ubuntu Server image and place the files in a directory /x86_root/. Then, I use chroot to run the x86 version of /x86_root/bin/bash against /x86_root/. The result is a nice working x86 shell on your ARM-based Raspberry Pi!
I go one step further and wrap running the shell with chroot into an executable script. I create a new SSH user ajay-x86@ that allows me to SSH and drop directly into an x86 shell instead of the native ARM shell I would get if SSH into ajay@.
The whole solution is elegant, simple, and has worked extremely well in my usage.
Casing and Cooling
The Pi boards are cased for protection along with a fan to prevent throttling of the CPU. The fan usually keeps it below $50^{\circ}$ celsius on idle and $70^{\circ}$ celsius at peak.
All of the different boxes are attached together using ceramic magnets (which are glued to the surfaces with a cyanoacrylate glue). This allows them to be disassembled and quickly snapped back together for easy portable transport in a smaller container.

Cost
All in all, the system cost around ~$600. The equivalent instances on AWS would cost around (without accounting for bandwidth / storage costs):
$$ 1 \space\text{8GB instance} * $0.05\space/\space\text{hour} * 24 * 30 * 12 $$ $$ +\space 3 \space\text{4GB instances} * $0.04\space/\space\text{hour} * 24 * 30 * 12 $$ $$ = $1,468.80\space/\space\text{year} $$
Yes, you could likely optimize this cost a little bit using RIs or a different host, but as a rough calculation, it works out to be much more affordable (especially over multiple years) and you get to avoid the suprise bills of AWS services.
But, you should still probably only use this for development or individual use cases, even though it can be served to the internet.
Size
Finally, for a sense of scale, the server is actually not that large and can be tucked away pretty easily especially since it can connect via WiFi.